EdisonDiamondDisc.com presents:
"SAVE YOUR AMBEROLA FROM THE UPS/DHL/USPS/FEDEX DELIVERY MONSTERS!"
If you have sold your machine, or are shipping it in for repairs, here are highly detailed instructions for proper packing
and shipping your tabletop Amberola. From my experience receiving
and shipping Amberolas, I can give you a liberal estimate
that 90% of all Amberols shipped receive internal and/or external wood/metal damages due to the heavy handling that they
endure during the shipping process, and IMPROPER PACKING!!!!!! Simple preparation and proper padding will save
you from needing big-$$$ repairs and mind-numbing insurance claim processing.
BUYERS: Send these instructions to the seller so they can pack the machine PROPERLY!
 **REMOVE GRILLE** This is done by lifting it UP to expose its lower edge, then removing it.
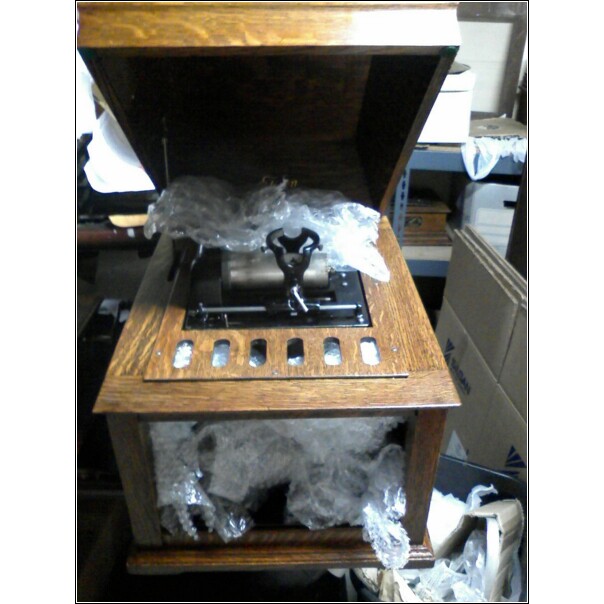
1. Remove sound reproducer (device that tracks the record grooves and reproduces the sound modulations). Wrap it in
bubble wrap and place inside horn.
2. Remove crank, wrap it in bubble wrap, place inside horn with
reproducer. If you have an earlier Amberola which have a
detachable tone arm that runs from the reproducer to the horn, you will
need to remove those, wrap them in bubble wrap, and place them in the
horn as well.
** MAKE SURE MOTOR IS COMPLETELY WOUND-DOWN**
3. As shown in picture (left), the horn and mechanism must be properly
padded to keep them from moving. Using crushed newspaper or
wadded bubblewrap, COMPLETELY surround the horn and underside of the
motor bedplate so that the horn will not move. Stuff some packing
material inside the horn, keeping the crank and reproducer secure
inside the horn. NEXT you will need to put wadded paper and/or
wadded bubblewrap(preferred) under the lid to keep everything
secured. Start by putting some in the back on either side of the
horn elbow, then work forward. You will want the lid to close
while offering some pressure to the packing material. Just a
little pressure is sufficient (enough to hold lid open 1/2" to 3/4"
when closed).
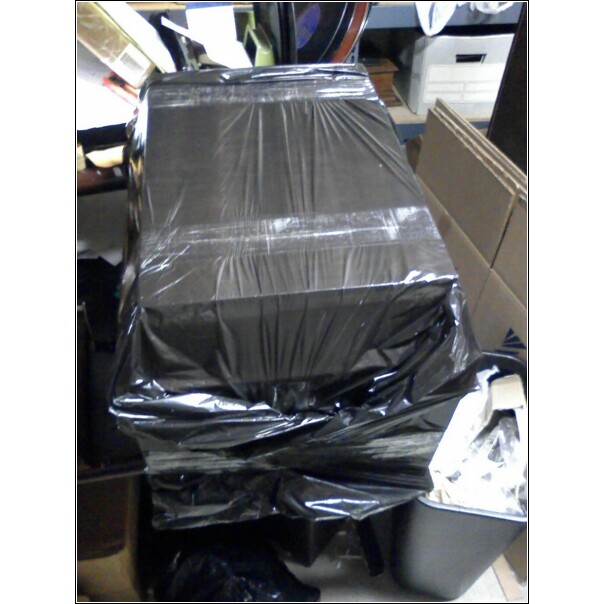
4. You will need a large (and strong) plastic bag. A yard
waste bag is perfect, or a 30/40/50 gallon size. Carefully slide
the bag over the phonograph. Next, using plastic shipping tape,
wrap AROUND the FRONT and the BACK of the machine to keep the lid
closed. Wrapping around the BACK keeps the lid secured so it does
not rip away from the main cabinet.
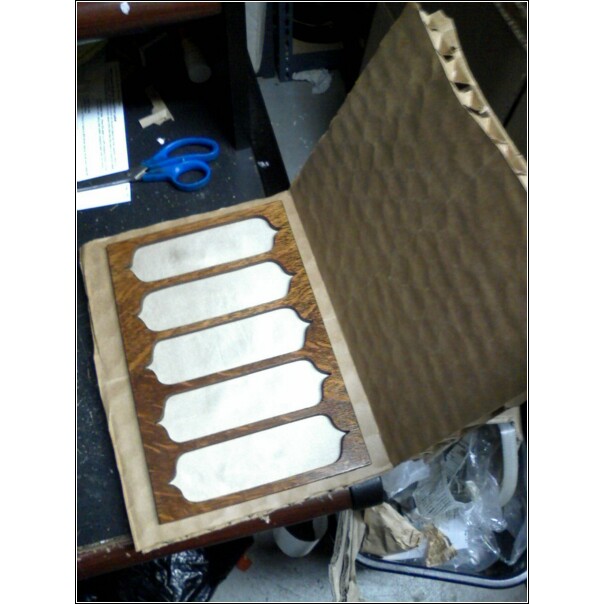
5. Sandwich the grille between multiple pieces of cardboard to keep it
from flexing and cracking (or bending, for metal grilles).
The grille "sandwich" should be placed next to or on top of the machine.
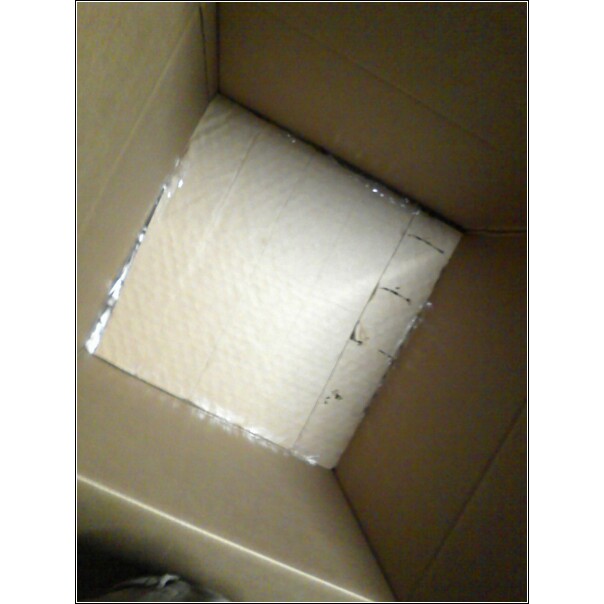
6. Box selection is IMPORTANT! Make sure your box
allows a 5" MINEMUM of padding space on all sides! I like to use
25x25x25 boxes, or a cut down "wardrobe" box which should have a basic
footprint of 24x21 or 22x19. DOUBLE-WALL CARDBOARD! As
shown on the left, I like to create a padded "shelf" for the phono to
sit on. This is done by putting 3" of styrofoam peanuts inside
the main box, and putting a piece of cardboard on top, using tape on
all edges to secure it into the main box. This absorbs most of the
"rumble" and "bump" of shipping.
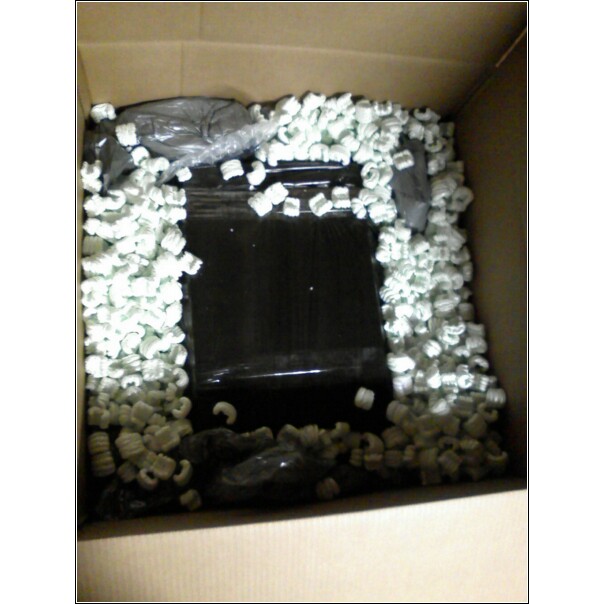
6. Place the phonograph and grille in the box, and surround it
with styrofoam peanuts (crushed newspaper WILL NOT WORK in this
situation). Compress the peanuts into position by pressing them
down with the palms of your hands, this assures maximum
application. Finish the job by taping the box up with lots of
clear tape, and putting FRAGILE stickers on ALL SIX SIDES!
There you go! If you have any suggestions, please email them to me: wyatt (at) edisondiamonddisc (dot) com